Showing posts with label Bell MD2637. Show all posts

Wednesday, December 19, 2012

Update on all kinds of projects from the doll studio!

I am woefully behind on updates regarding what I've been doing in doll class, that's for sure! So here's an update. . .

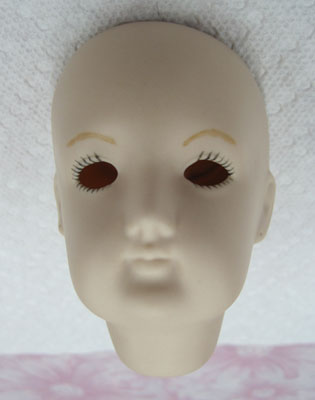
First, I finished a head for a second 18" FFD:
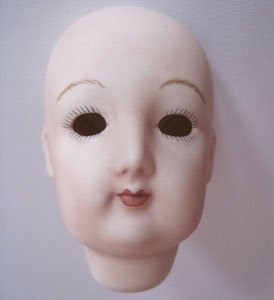


This doll is the same mold I used last time, but I did some things differently this time around. For one, instead of going with a pouring in a skin-like color, she was poured in white, and I did what's called a "wash" to give her skin a flesh color. Another thing I did was to outline the lips with a stronger red, in imitation of what was done on the antiques. I still feel I have a ways to go, but I'm pleased with how she turned out, in the end. (And no, I still haven't got a body, wig, or clothing of any kind on the first one! Therefore, this second one is likely to be a "floating head" for quite some time!)

Next, remember those super tiny fairy heads? Well, they have their bodies now!
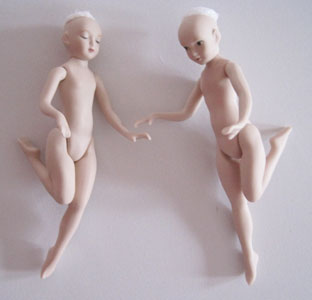


Of course, no clothing or wigs on these guys yet. . . Nor is there likely to be any time soon because in my head, they are Christmas fairies, and I've no intention of finishing them in time for this Christmas, so I'll bet they don't get finished until next year's holiday season!

But most recently, I've been taking a brief break from the dolls and making a couple of ornaments in class. Every year, a friend of ours hosts an ornament swap, and hand made ornaments are encouarged. I decided since this is the year in which I've learned to make things of porcelain, that a porcelain ornament was in order! And, that instead of making life easy and using decals, I felt the need to hand paint a design, LOL! I decided on snowman because I figured they'd be fairly easy to draw. They were a little tricky in that you can't put white over colors, so for the first firing, I was only able to paint the blue background, and so they looked like this:
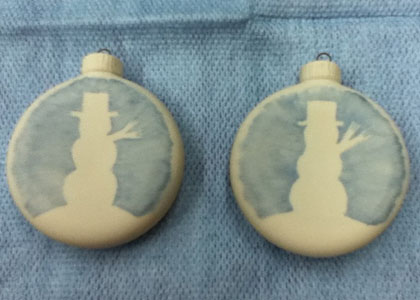


Then, over the next couple of weeks, I added the white, and then the details and the gold at the top (which has real gold in it!) I really hope they'll go over well at the swap!
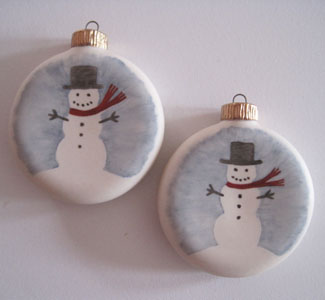


So that's the end of doll classes for this year. I started in February, so took classes for almost a year, and I ended up with three antique repro dolls (well, the parts for them anyhow!), two fairies, and two ornaments. . . Not too bad! When I start back up again in January, I'll be working on yet another French fashion doll, but this time, from a different mold. . .
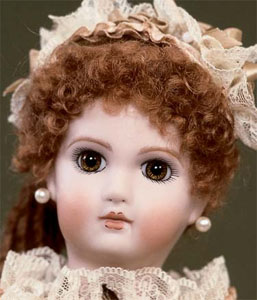


Bell's MD2027, or "Renee," creates a 15" doll, so this one could be a friend for Fanny. And, I'll be up for a challenge since the smaller scale means a need for even more intricate brows and lashes. I'm going to have to come up with a brush that is way less full or I'll go nuts, ha ha ha!

So, just for the record, between the dolls I made this year, and the few I aquired already-made, we're now up to eight dolls who need to be clothed, and of these, five need bodies (or repairs/replacement parts), and three need wigs. Not to mention, I haven't made anything for Charlotte in forever, and she's still waiting on getting a nice 18c wig made for her. Yikes! It seems like my New Year's Resolution should probably be to punch out a bunch of bodies, wigs, and doll clothes! ;)
Saturday, November 3, 2012

Body pattern progress!

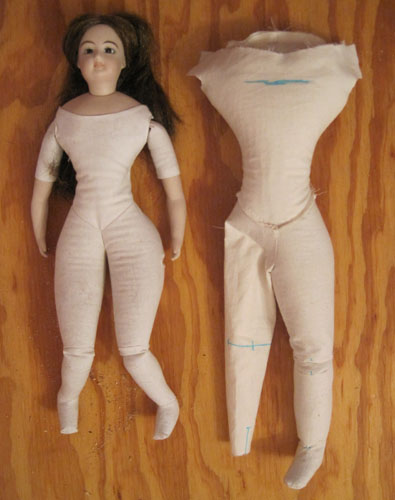
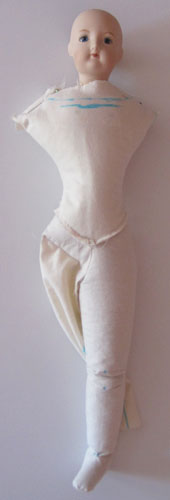
So you all know how I've whined about this doll body situation; about knock knees, ginormous back sides, and posture problems. Well, I've been working hard on making a body pattern that satisfies me. I molded a body out of clay to pattern my own body off of, I studied a crazy insane amount of pictures of extant French Fashion dolls in their birthday suits, and referenced assorted doll making patterns and books. And, at long last, I think I'm just about there!


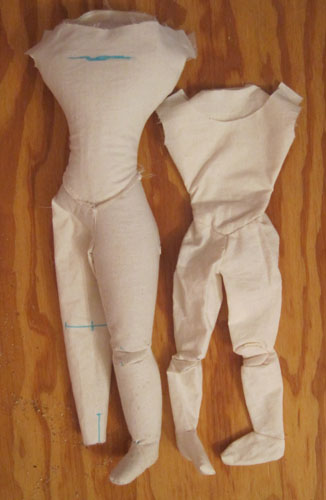
(Sorry about the creepy one-legged thing going on; I didn't feel like making twice the gussets and doing all that stuffing when I could easily see if it would work by just making the one leg!) I just need to tweak the gussets a tiny bit, and to scale down/shorten the bodice area a bit (that's what all the markings are about), and I think she'll be good to go! And, with the head attached, she's almost exactly 18", which was the suggested height for this doll. Just to compare, here is the pattern that allegedly was created to fit her:


*rolls eyes* Granted, I altered that body a bit, but I did not alter anything that would have impacted the scale/height. Although I did lengthen the leg to go down to the foot, instead of ending above the knee, I used the porcelain part for this doll to add that length. She would have looked freaky on such a tiny body!

Also, check this out:


No more problems with ginormous back-side, legs that won't come near being straight, and bad knock-knee-itis! My new body can't sit, but she can perch, and I'm fine with that, because I think that's about the same mobility the original dolls had, based on the creases/signs of wear I see pretty consistently on them.

Guys, I'm so excited! Today I get to finally break ground on the actual body; not a test pattern, not a mock-up, not any other preparatory step. . . It's time for the real deal! And you know what that means? That some day very soon, I will get to start making tiny Victorian costumes for this gal! Hooray for that!!!

Sunday, July 22, 2012

Doll body pattern fail. :(

Ugh, I loathe making doll bodies, I really do!!! I didn’t start out that way. . . I started out thinking they were completely tedious (mostly because of setting in the gussets, which is the most miserable thing I’ve yet encountered in my 2.5 decades of sewing everything from corsets to curtains), but after now making three different body patterns, I’ve gone from slight annoyance to total aggravation.

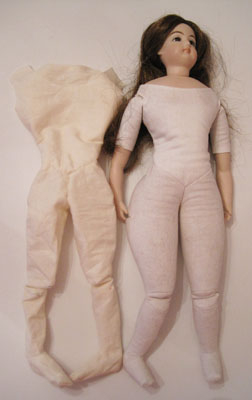
First, it was Fanny’s body, which was some random 1980s pattern, and yielded the right height body, but it was knock-kneed, and had a huge rear. Then, the pattern for that “Marie Louise” doll I made in class, which was also about the right size (actually, as I look at her now, I think she’s too long-waisted, and her arms are therefore ridiculously long too) but severely knock-kneed. And now. . .


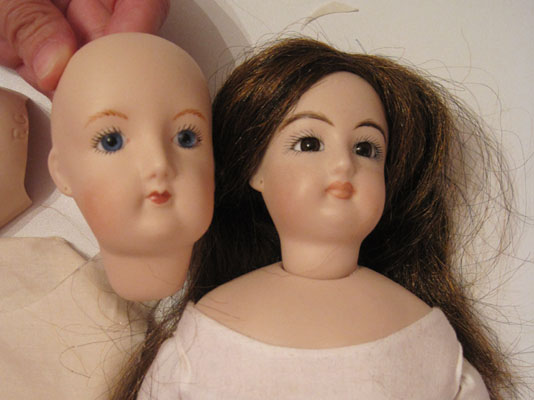
This may not look like tragedy at first glance, but it is, and I’ll tell you why: The body on the left is supposed to be for a doll that is three inches taller than the doll on the right (Fanny). To put it in perspective, here is a comparison of the two doll heads in question:


I’m using the pattern that matches the mold # of the doll head I made, so there is no excuse for it not to be perfectly sized. The only change I made to the pattern was that I added from the knee to the foot, but as you can see, the knee was already at the same level – if not shorter than – the location of Fanny’s. Also, I think the “larger” doll body is actually skinnier than Fanny’s, too! And, knock-kneed, AGAIN! UUUUUUGGGGGHHHHH!!!!! And I do realize porcelain shrinks when fired, so there’s a chance my head is slightly different in size than the head the pattern maker was working with, but. . . The fact remains that this body, at 13” tall, is nowhere near appropriate for an 18” doll – and that’s what the details about this mold claim the doll to be. So, it’s clearly just an improperly sized pattern.

Have I mentioned before that I have a zero tolerance policy for sloppiness in patterns? Well, I do. It’s because I think it’s sheer laziness when a pattern maker a.) does not make sure seams line up, and b.) does not do at least a mock-up, but better yet, a full-blown sample, of the pattern. If you’re not willing to do these two things, then you’re better off not publishing your pattern at all because all you’re doing is driving people to madness!!!

Okay, now that I got that out of my system. . .

Clearly, the only thing for me to do here is to craft my own pattern, from scratch, for these French Fashion dolls. It will come sized correctly for 12”, 15”, 18”, and 20” dolls (because those are the mold sizes I’ve encountered), all seams will line up, including gussets into their slits, and it will not be knock-kneed!!!!! And guess what? I’ll even test the pattern before I publish it. Novel concept, that. *rolls eyes sarcastically*

I don’t know when I’m going to become inspired to embark on that adventure, because the only thing I can think to do is mold a body somehow, then drape a pattern onto it, and work from there. . . And this seems like a huge amount of work. . . But in the meantime, I will work on attaching the head to the shoulder plate (need my Glennie’s help with that, as it’s a two-person job!) and then making a wig. Because I’m out of work and also as thrifty as any Scottish-blooded person you can find, I’m pilfering hair from an old Halloween costume wig, which I think is close enough in color to work:


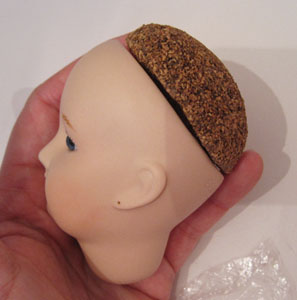
And look! I was digging around in my box of doll parts (that really does sound so creepy!) and I discovered that when I was ordering pate possibilities for Fanny, I ended up with a cork pate that was too big for her. . . But is almost perfect for the new doll!


I’m pretty excited about having a cork pate, because it’s a nice solid foundation to pin the wig on to, (pinning the wig being a period way to attach the wig to this sort of doll, from what I’ve read).

So, this doll may not have a body, but hopefully she will at least soon be a well-coiffed floating head! ;)

Thursday, July 5, 2012

My first FFD head, finished!

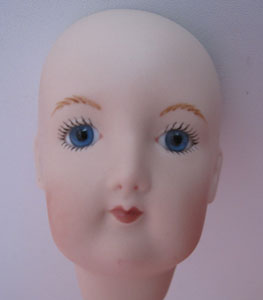
I finished my first French Fashion doll head!!!


I am pretty happy with how she turned out. I like her in real life better than I like the stock photo on the Bell web site, and I already liked the stock photo, so. . . Good news there! :)

My next steps for her are to make a wig and a body for her. She'll be around 18" when finished, and will have dark blonde hair. I am going to be making the wig! For now, I'm pilfering hair from a cheap Halloween costume wig, but some day, I'll make one in nice mohair.

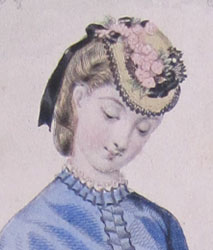
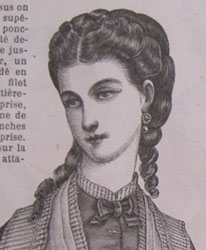
I'm presently trying to make a final decision on a style. I know for sure that I'm aiming for 1870s, and that I want no bangs, a center part, and then I'll style it somehow at the back. What I don't know is if I want something something that is very simple and pulled back, like the 1870 fashion plate below on the left, or if I want to go for the look with the curls down the back, like the 1874 illustration below on the right. At the moment, I lean more towards the curls-down-the-back. . .


In other news. . . I have no idea what to do next in doll class! I just recently got laid off due to a major workforce reduction at my company, and I am worried about how long it will take me to get another job, and if the severance will last as long as I need it to, and therefore trying not to spend frivolously in any way from now until getting a new job. But, I've paid for classes for the month of July, and it would be silly to not have anything to do all month, so, I think I'll just have to have another doll poured, and suffer the shopper's remorse! But then the next question is. . . Which doll? Hmm. . .

Wednesday, May 16, 2012

Two hour lashes.

Just my weekly post-clast update here. . . This week? Upper lashes. That's right, a two hour class, and all I did was upper lashes. Well, not quite two hours; I left 15 minutes early and of course didn't start the minute I walked in! Anyhow. I definitely feel I'm getting more comfortable with lash-making, in that it doesn't feel so foreign holding the brush/scary trying it, however, I still struggle to properly slant my lashes! But in the end, I got results that satisfy me. For now. I might go back and add some more lashes nearer the corners of the eye, because while they looked "done" to me in class, now that I see them again, I think they might need it. . .

Tuesday, May 8, 2012

First day of painting. . .

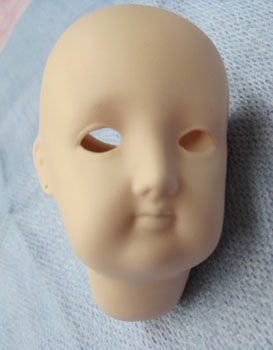
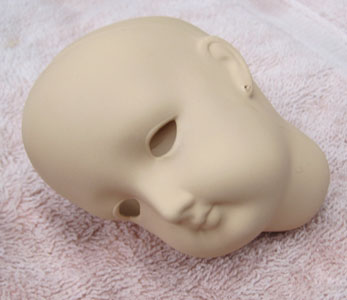
Last night I started painting the new doll! Here is her "before" shot:


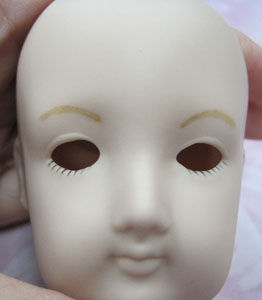
And, after an hour or so of work, here is all I had to show for it:


The brow line went very fast (and is only a base line, over which I'll put more "brow hairs" next week). The lashes though? OMG lashes will be the death of me!!! I can NOT TELL YOU how many times I painted on lashses and wiped them off and did them again. Over and over. I got one side awesome pretty quick, but her right side. . . Ugh! I was just about to give up for the day, and I thought, I'll try it once more. And voila! Not perfect lashes, but satisfactory. This whole craft has been an exercise in me forcing myself to let go of perfection, LOL! But still, I think they turned out all right. I'm happy. :)

Thursday, May 3, 2012

Drawers!

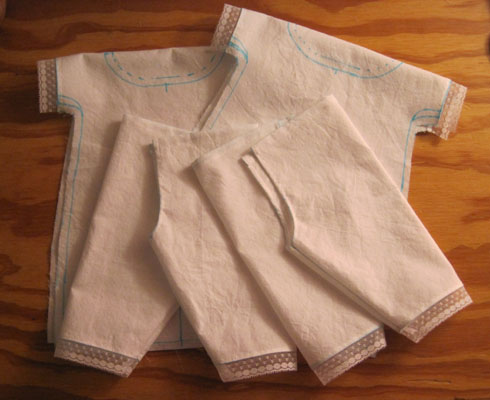
I finished the Marie Louise drawers last night! I also did a little more work on the chemises. . .


I'm really wanting to finish both underpinning sets before next Monday's class, but, we'll see!

Speaking of class. . . This week, I finished the greenware cleaning on the head and shoulderplate. So next week, painting begins! Hooray!

Monday, April 23, 2012

The start of a new doll. . .

Tonight I started a new doll in class!


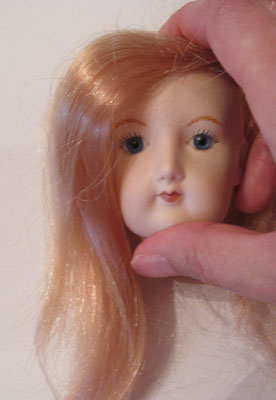
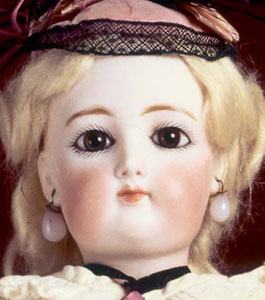
She is Bell mold #MD2637, an 18" French Fashion doll, who should some day look something like this picture from the Bell web site:


New things I needed to learn to make this doll was beveling the eyes, and also dealing with hands that have spread out fingers. I was so sure I was going to break a finger, but I didn't!

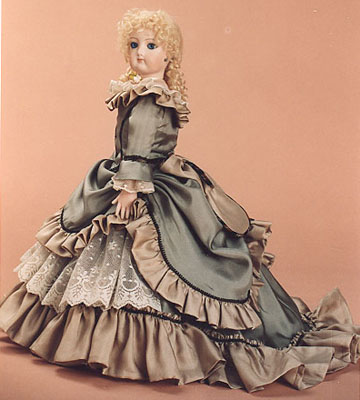
This is the dress pattern that was made to go with her (Bell #RP2637B):


Not sure if I'll use it or not. . . Most likely I'll use bits and pieces, and change it here and there to make it my own. Still plenty of time before I get to that, since Marie Louise took about two months, start to finish, so I'm guessing this doll will be somewhere near that. So yes, lots of time to daydream about clothing. Meanwhile, I should maybe make something for poor Marie Louise to wear! This nude doll thing is getting to be quite an epidemic in this sewing room of mine! For shame!